Friday, January 25, 2013

Good news and bad news...


Pins & Needles has made a couple of decisions that can be classified as good news and bad news. Should we give you the bad news first or the good news first??? Well here, how about I detour for a minute and let you play a round of scrabble with us. Here is what is on the scrabble board now.


Oh, what does that say? A new baby?!?! Why yes it is true, Miss Tasha and her hubby are expecting a new baby this summer! Unfortunately that takes me to the bad news. Because now both Amy and Tasha will be expecting bundles of joy, we will not be at the Farmer’s Market this summer. Finger’s crossed that we will be able to get a couple booths this fall/winter at some of the Holiday Bazaars and then for sure have a booth summer of 2014.

Now some good news, ok so having a baby is good news, but here is some more for you to chew on! Pins & Needles has their very own website!! Not just a blog page, or Facebook, but a real website! You will be able to read the blog, shop, and get into contact with us all in one spot now! Tomorrow we will post the website address; we still want to fiddle with a couple of things.

Not a bad post, not as bad as we may have led you all to believe, but still; there are some pretty exciting things happening for Amy and Tasha! And those of you who think we are absolutely crazy, running two stores, raising toddler boys, and preparing to have MORE babies yes we know we are crazy and we are enjoying every minute of it! And if we aren’t well, that makes for fun stories to blog about!

Dress form DIY


I previously mentioned that I was trying my hand at making my own dress form. A good one is pretty spendy, and I don't have that kind of moolah right now. So what better than finding a recipe on Pinterest to make one out of duct tape! My sister came over to visit for a couple days so who better to help. I know if I asked my husband to tape my body with duct tape he would look at me like I was crazy!!


                After a trip to the store to get a butt load of duct tape, my sister and I started taping. At first it was funny then when I realized I couldn’t move and I was literally at her will. Thankfully I hadn’t done anything to make her mad so she didn’t leave me stuck like that for hours, now if I would have asked her to do this to me when I was say 13 she would have left me like that for days and taped my mouth shut too! Ha ha, I am kidding only I’m not!

        Once cut from my duct tape body cast, we assembled the base out of cardboard and a large cardboard roll that I got from an order of fabric. It is a nice sturdy base that took us about a half an hour to cut out. I spray painted it a neutral color, and set it off to the side.

        Next I stuffed that bad boy as full as I could. I taped cardboard around the arm and neck holes and then once fully stuffed covered the bottom as well. I made a hole to be able to slide the pole down and secured it with a bead of hot glue. At this point you can be done, but I wanted to cover the dress form to look a little nicer. Thankfully I had a very stretchy long turtle neck shirt that I threw over it and it fit perfectly!

I didn’t get pictures of the during process, but here are a couple pictures show casing not only my fantastic aprons that I make, and are for sale on the website, but the fun new dress form as well!

Follow us on Facebook

Tuesday, January 22, 2013

Tasty Tuesday

Sorry for being a no show yesterday, Amy and I have been pretty busy these last couple of days! You will have to also excuse my posts if they seem short and dull, my Internet is working when it wants to and that leaves me blogging on my phone! iPhones are pretty nifty but there is only so much you can do on that little itty bitty screen! :)

       Today on Tasty Tuesday I am going to share my favorite breakfast! Egg white veggie muffins! Sounds odd I know but they are healthy and yummy and super easy! I make about a weeks worth at a time.

      Here is what you will need:

Egg whites
Veggies (of your choice)
Muffin pan
Cooking spray
Seasoning (again of your choice)

     Per heat your oven to 350 degrees, spray muffin tin with cooking spray. If you want you can add your veggies and egg whites directly into the tin like I do or mix all ingredients in a seperate bowl. I like to add a little egg white to each cup on the tin, then add some salt, pepper and original Mrs. Dash. Then add some sliced fresh mushrooms and red and yellow peppers. Put a couple pieces if fresh spinach on top then full the cup the rest of the way with egg whites. It will depend on your oven, but cook your muffins about 15-20 minutes.


      When I take them out of the oven I run a butter knife around the edge of all of my muffins but I don't remove them from the tin until mostly cool. Once I remove them I let them completely cool, unless I'm going to enjoy a couple right away, then I put them in ziploc bags. I like to put two in a bag that way each morning you can grab out a bag heat it up really quick in the microwave and have breakfast ready!!

     It is a wonderful and healthy recipe! If you wanted you can experiment with all sorts of veggies and meat and cheese! If you do please let me know how they taste!!

Sunday, January 20, 2013

Dang it Pinterest...


Ok Pinterest you have consumed a lot of my day ok I lied, you have consumed a lot of my week this week!! Not just surfing it for hours on end, but I actually decided to try out a handful of the projects I have pinned. Say Whaaaaaaaaaat?? I know, people actually find that website useful for more than just something to occupy their time while keeping the computer chair seat warm. And by the way my seat is nice and toasty, thank you for asking!

There is only one small problem I didn’t get a lot of pictures of the stuff I decided to try out because of a.) I got way too excited and just started making stuff only stopping to remember to take pictures of the progress for the blog as I was finishing the project up! BAHHHH right?! Or b.) They are still works in progress and I don’t want to show an unfinished project!

I will however show you the picture of the one project that is completed (don’t judge on how slow I am going, my sister surprised me and came to visit and then I did happen to drive three hours to go and visit my parental units this blog comes to you from their home actually) I saw a little thing about turning a pair of socks into baby leggings super cute idea! Here is what my outcome was, because again I failed you all and forgot to take before and after pictures ( my sister chewed my butt a little for not doing it, I guess she likes to read the tutorials on here too).


The other two projects are making my very own dress form!!! This is a big task and I was thankful for my sister to be there to help with some of the hard stuff Like taping my back and butt, and helping with the base that unfortunately started to resemble a stripper pole! Hence not taking pictures of the “during” process of this project because this is a family show y’all!  

The other project is for my store and the Farmer’s Market this summer, and that is a hybrid of 3 different bibs I have seen. They may be one of my favorite things I have made in a really long time!

Oh I almost forgot about my booties!! I found a pattern online for normal baby booties, and I added some “Toms” inspired flare to them. Here they are,


You can buy these at Paige P. Boutique. Be on the lookout for moor booties to be coming too!
 

Follow us on Facebook
 

Saturday, January 19, 2013

GIVEAWAY!!!!!!


Are you ready for a giveaway?!?!?! It is simple; to be entered to win you must subscribe to our blog and then comment on your favorite blog post! Let us know that you appreciate the hard work we put in each day!

 What is it that we are giving away? Well that is up to you! Two lucky people will be randomly drawn by their comments using RANDOM.org, and you get to decide if you would like a $10 gift card to Starbucks OR a $10 gift card to either of our etsy stores, Seams like Sunday and Paige P.Boutique!

It is pretty easy to win!! Share this with your friends and maybe you both will become winners!

We will do the drawing next Saturday January 26th, this gives you an extra weeks’ worth of blogs to read through and decide on a favorite!

We can’t wait to hear from you all!

 
&
Follow us on Facebook
 

Friday, January 18, 2013

Valentine's Project and Some Tips for Sewing with Vinyl


I've been working on some Valentine's Day projects lately and one of them involves vinyl. Yick. It took me a while, but I finally got some things figured out!


Red Marine Vinyl from Joann's

The first thing I figured out was to cut this one layer at a time! I tend to be an impatient cutter, so if it's just cotton or something, I can do four or so layers. Straight lines with my rotary and a ruler, I can manage way more! But vinyl is apparently finicky and you don't end up with accurate lines when you do it that way. So I took it as a lesson in patience. Or something...


I know a lot of people use binder clips or paper clips to hold their vinyl, but I found if I pinned close to the edges,


the pin holes practically disappeared by the end.


I also found on curved seams, you still have to clip the seam allowance. I thought I could get away with just flipping it over (yeah, yeah, the whole patience thing didn't stick), but that caused real problems!


These (hard-to-see) little messy spots are from not clipping the seams, and also from sewing the lining on the outside. That doesn't sound like a big deal, but since the vinyl doesn't have any give to it, it pulled the lining away from the edges - despite using pins - and made it a pain in the patoot to keep even while sewing.

As for the actual sewing, I've heard a couple different methods for keeping the vinyl from sticking to the presser foot. My son is currently addicted to Mythbusters, so I figured I better conduct my own experiment!


The first method is to use tissue paper over the vinyl. This worked, to an extent. It was really difficult to see where I was sewing though, and the paper stuck inside the stitches.


Also, it would take forever to pick it out of all the seams!


The second way is to put a piece of Scotch tape over the bottom of the foot. Be sure to cut out a little window over where the needle goes down before you start sewing! Some of us forgot this little step and now have a sticky needle...


Other than that, it worked like a charm! Even with a fancy stitch that moved the vinyl all over the place.


And it worked quite well on the actual project, too - curves and all.

So - wanna see what I'm making? Of course you do!

                               A button just for Tasha


These sweet little bags! Personally, I'm in love with them! My normal philosophy is to make boy stuff because there are sooo many girly things available, but I couldn't resist when I had this idea :)

They have a lace strap and are lined with white, sparkle gray, or dark gray and have random pretty buttons from my collection (I knew I was saving those for something!).


Want one for your own little Valentine? You can pick them up in my Etsy shop!

And, just for fun (and because this is our blog, after all), gratuitous pictures of John playing Cupid - whether he was happy about it or not!

"OK this is weird"
"Yeah look. It's a bag. Happy?"
"This is fun!"


"Wait, you're putting these pics where?"
"But people will see them!"
"Please?"
"Daddy's gonna get you!"
"Hey look! It opens!"


"Sharp?" His favorite thing to test.
 

Cupid's arm guard?


Happy sewing!


Thursday, January 17, 2013

Kiddie Korner Thursday - toys= games


Kiddie Korner Thursday Hand me down toys = games


Being a stay at home mom, I love being able to be hands on in my son’s learning. Being a stay at home mom also means that we only have my husband’s income as our steady income, meaning I can’t go out and spend tons and tons of money on all of the super cool new learning toys that are out there. Last year we put a pretty penny down for a giant book set that will help Miles learn from the age of two all the way into his college years which is great but sometimes he doesn’t want to read books he wants to play.

I have been trying to invent ways to take his toys and turn them into some sort of game that will teach him something anything actually but my favorite thing right now is hand me down toys. I will accept any sort of game/puzzle/learning toy for any age and find a way to cater to his age with it.

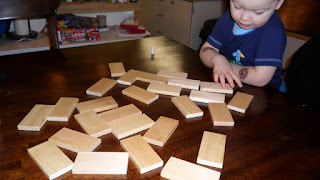
I will show you an example here today. I received this really cute wooden set of dominos with animals on them. Being almost 2 and a half I think dominos might be a little too advanced for my bugs still. He is a very smart cookie, but if he could correctly play dominos I am pretty sure I would poop my pants! Not literally, but maybe literally!!

Here is what the dominos look like.


We play almost like a game of memory. I will show him all of the animals on the blocks and then turn them all upside down.


I will call out the name of an animal and he has to look through the dominos until he finds that animal. He then has to show it to me and set it to the side.


Sometimes we will do it based on color, sometimes we stick just to the names of the animals. Here is a video of us playing/ learning.


If we do a round of naming the animals, we will follow up by sorting the animals by colors!

                              Surveying the animals


                    Now in deep thought about the animals.
 
                               Finally ready to sort!
I don’t do this game with him every day but try to do it a couple times a week! Look around your house and see what you have that you can turn into a learning tool for your little ones, that might trick them into thinking they are just playing!
 
Follow us on Facebook